Arigato PRO Premium Auto-Responder: Quick Getting Started Guide
You have made the great choice to purchase Arigato PRO. Now, let's get started in 5 minutes:
1. Activate the plugin
This is quite obvious :) If you have purchased the Intelligence module, it's another plugin. You need to install and activate Arigato PRO before the Intelligence module.
2. Setup your sender's email address:
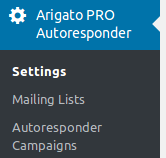
Do this from the Arigato PRO Settings page from the newly appeared menu in your dashboard:
On top of the Settings page you'll see the following:

It defaults to the email address from your main WordPress Settings page. Feel free to change it, and change "WordPress" to a name that you want to appear in the "sender" field when people receive your emails in their mail boxes.
3. Set up running preference:
After the General Settings section on the same page you'll see this:

It's recommended to set up your own cron job on the server because this offers more flexibility. However if you are less technical, feel free to use the second option - it uses the standard WordPress way of calling scheduled tasks which is also very reliable.
Don't worry, setting up a real cron job is also easy. You just need to copy the command from your Arigato Pro Help page and place it in the Cron Jobs section of your hosting control panel.
4. Set up the running and sending limits
If your hosting company puts any limits on the number of the emails that can be sent at once, per hour, or per day, set them on the same Arigato PRO Settings page:
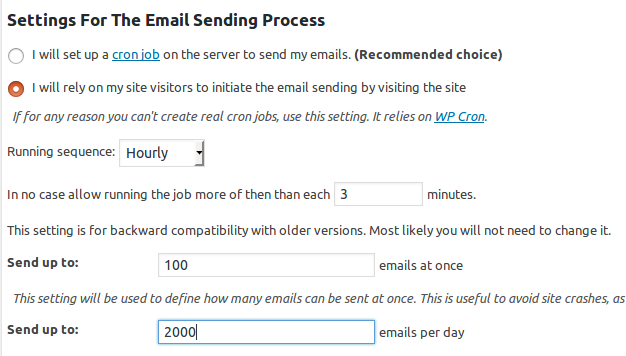
Think about this: If your running sequence is hourly and you set up "Send up to 100 emails at once", this means you are setting up a limit of 100 emails per hour. If you use server cron jobs running each 15 minutes and you set up "Send up to 100 emails at once" this means you are setting a limit of 400 emails per hour.
5. Publish your subscribe form
Go to your "Mailing Lists" page.
At the time of installing Arigato PRO, one mailing list called "Default" was automatically created. You can of course create more lists or copy the data from Arigato Lite (if installed you can do this from the bottom of Arigato PRO Settings page).
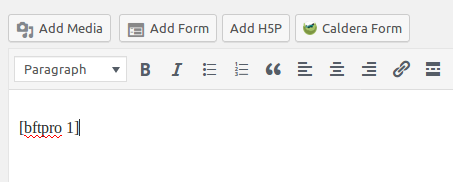
Copy the shortcode you see under the Subscribe Form column of the table:

Then go to create a new Post or Page from your WordPress menu and paste the shortcode in it:
6. Now you are ready to accept subscribers
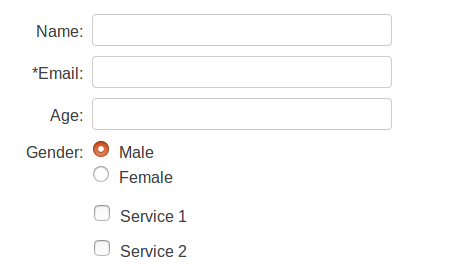
Here is how your form may look when published on your site. This is a form with a couple of custom fields:
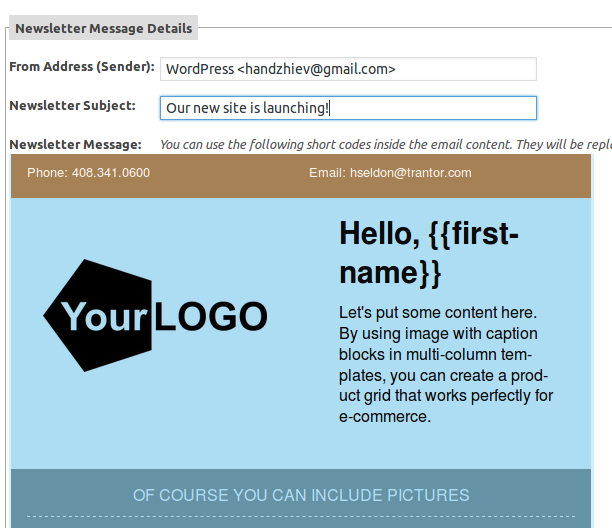
7. Sending a Newsletter
Arigato PRO is a sequential auto-responder (drip marketing) software but it can also send newsletters. To send a newsletter to some of your mailing lists go to Newsletters link in the menu and create one - either using the editor or using some of our presets:
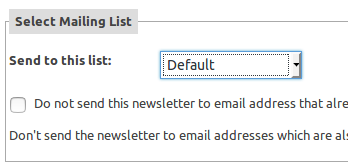
Select the mailing list you want to send to, and hit "Create and Send":
The newsletter will be send by your scheduled task (cron job) instead of all at once so it may take some time to have it delivered to all your subscribers. How much is it going to take? This depends on how often your scheduled task runs and what are your "mails at once" limits.
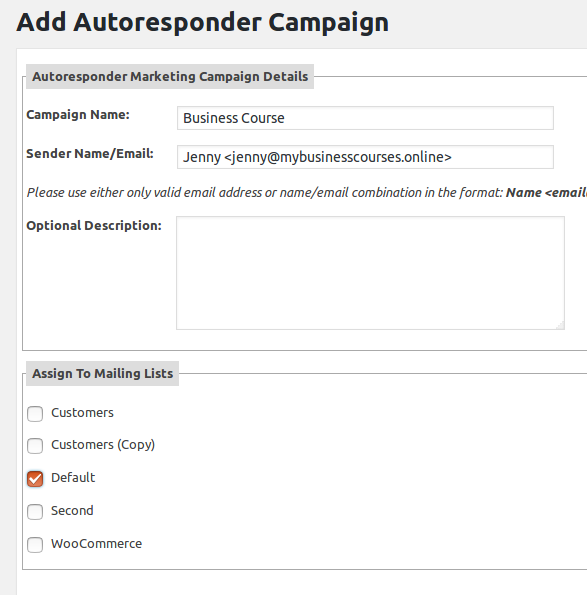
8. Creating a Welcome Message
Maybe you want to greet your subscribers immediately when they sign up, or to send them initial instructions, first lesson from a course, and so on. Here's how to do it.
Create an Autoresponder campaign and assign it to your mailing list:
Go to your "Autoresponder Campaigns" link and click on "Manage" under "Email Messages" column. On the next page you can again a new message using either the free editor or some of pre-designed presets:
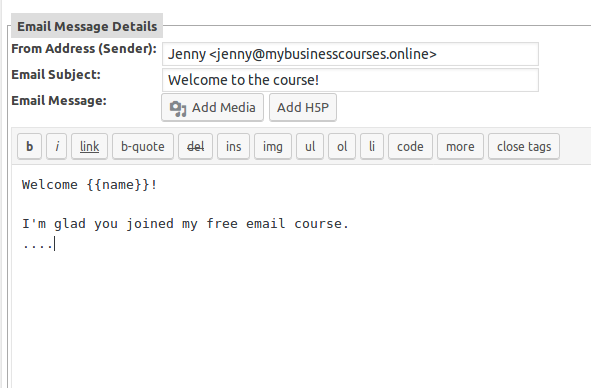
In "Email Sending Options" section, set it to be sent "0" days after user registration:
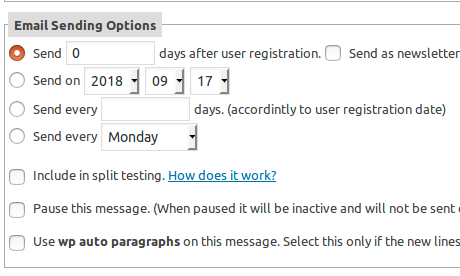
Such a message, with "0" days after registration selected, will be sent immediately when user registers without waiting for your scheduled task (unless you explicitly specify time of the day).
9. Creating a Follow Up
Creating follow up messages is exactly the same as creating a welcome message, but instead of setting "0" days, you set 1, 3, 7, or any number of days after user registration. As you can see there are also other options: sending on a fixed date, send the message every 5 days, send it every Tuesday (or any other week day), on user's birthday (if you have created a custom "date" field for birthday), etc.
Note the following checkbox option when creating a message of type "X days after user registration":

What does this mean? "Send as newsletter to these who will never get it..."? See the above example, we are adding a new message to be sent seven days after user registration now. But what if our mailing list is older and there are people registered 10, 20 or 100 days ago at the time when we are adding this new message in the sequence?. They will not get it, because 7 days have passed for them. Using this option you may send them the same message as a newsletter, if you wish so.
And More:
- 1 Year Of FREE Upgrades
- 1 Year Of FREE Support
- Forever Valid License
- Instant Delivery
- UNLIMITED Domains License For Domains You Own
- Open Source Code
- Localization Ready
- Mobile/Touch Friendly
- 18 Years Online History
- 60 Days Refund Policy